The first thing you need to make this album is a single piece of 12" x 12" card stock. This will be your base.
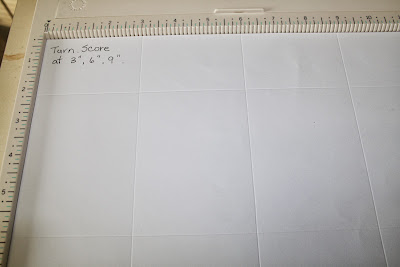
Step 1 ~ Using a scoreboard, score at 2", 6" and 10".
Step 2 ~ Rotate the page and then score at 3", 6" and 9".
Step 1 ~ Using a scoreboard, score at 2", 6" and 10".
Step 3 ~ Fold along all score lines, making the 2" folds into pockets.
Step 4 ~ Cut along middle score line, leaving 3" together.
Step 5 ~ Add score tape to the back of the page that is not cut. Put this page together. Next, accordion pleat the other pages to make a book. Add score tape to the back of these pages to hold together. Also, add score tape to the open ends of the pockets.
Step 6 ~ Cut tags for the pockets. Embellish album and tags as desired. Tie the album closed with a ribbon.
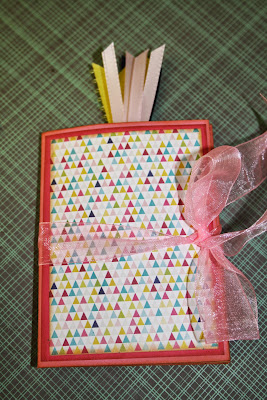
The white and kraft albums were just to show you the steps. Here is a picture of my finished album:
And this is how I used it:
Left side:
Right side:
I used it for a journalling box for a layout. I have missed scrap booking as I have been making so many cards so I went back to my first love of paper crafting and made a scrap book page. In keeping with the theme of the month "BIRTHDAYS" this layout showcases my 50th birthday. I am still looking for a catchy title so if you can think of one, please leave it for me in the comment section.
RECIPE:
(all linked supplies are available at One Crazy Stamper)
Card Stock ~ Bazzill Basics Smooth Card Stock
Patterned Paper ~ Echo Park "Here and Now" 12" x 12" Kit
Spellbinders "Foliage" Die Cuts
Flowers ~ Prima
Rhinestones ~ Kaiserkraft Silver
Stamp ~ Whimsy "Birthday Greetings"
Ink ~ Close to My Heart Moonstruck
Ribbons ~ "Use it Up" Inventory
Remember you still have time a few more days to enter our "BIRTHDAY" challenge as there will be a new one posted on September 1.
Thanks for stopping in today. I hope you enjoyed my tutorial for this cute little mini album/card book and that you give one a try. Remember to leave me a comment if you try one so I can come see yours. Have a GREAT day!!!
{{{{{HUGS}}}}}}, Heather


This is awesome! Thanks for the tutorial! :) Janis
ReplyDeleteThis is amazing! Love the pictures that are added!
ReplyDeleteThis is such a great tutorial. I can't wait to try it. Great job!!
ReplyDelete